

Workbench Organization for Scale Modelers
Set up your modeling workspace so the right tool is always in reach — before you need it.
Most workbench organization advice focuses on tidiness. That's not the goal. The goal is reducing friction — making it faster to find tools, easier to switch between build stages, and less likely that a misplaced cutting mat or a cap-off panel liner ruins a session. This guide covers how to organize a scale modeling workbench by how you actually build, not by how it looks in a photo.
The Core Principle: Organize by Build Stage
The biggest mistake in workbench organization is grouping tools by type — all nippers together, all brushes together, all paints together. That makes sense visually but creates constant reaching across the desk during a build session.
A better system organizes by build stage: everything you need for cutting and cleanup together, everything for sanding together, everything for painting and finishing together. When you're in the sanding stage, everything you need is in one zone. When you move to panel lining, you shift zones — not search the whole desk.
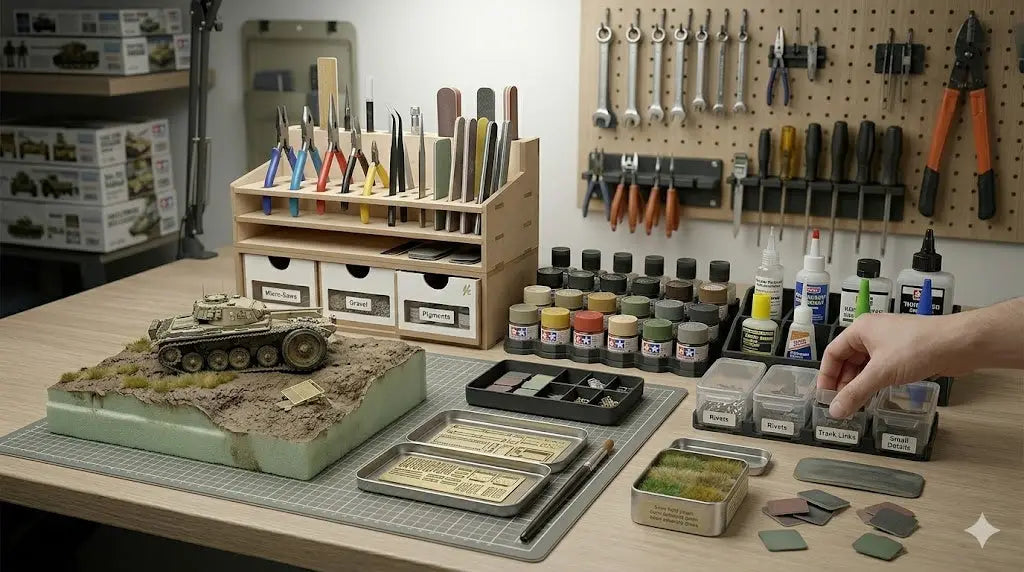
Zone 1 (immediate reach, right in front): the active build, cutting mat, and whatever you're currently using. Zone 2 (close reach, sides): the current build stage's tools. Zone 3 (further back or shelved): everything else — paints not in use, reference materials, storage.
Zone 1: The Active Work Area
This is the space directly in front of you — roughly 40cm wide and 30cm deep. It should contain only two things: your cutting mat and the part or subassembly you're currently working on. Nothing else lives here permanently.
A self-healing cutting mat that fits your work zone properly matters more than most builders acknowledge. Too small and you're constantly working off the edge; too large and it eats desk space. A3 (45×30cm) is the practical sweet spot for most hobby desks — wide enough to handle runners and subassemblies, small enough to leave space for tools in Zone 2.
Zone 2: Active Tool Zones by Stage
Cutting Stage Setup
Nippers (both double and single blade), hobby knife with spare blades, and a scribing tool if you're doing panel lines. These sit in a small container or tool roll to the right of the mat — upright so you can pick them by touch without looking away from the part.
Sanding Stage Setup
Sanding sticks sorted by grit (low to high, left to right), the electric sander if you use one, and a small brush for clearing plastic dust from the surface before moving to the next grit. Nothing slows sanding down more than having to hunt for the #600 stick when your hands are already covered in plastic dust.
Painting and Finishing Stage Setup
Panel liner, liner brush, cotton swabs for cleanup, and any washes you're using — all within arm's reach and all with caps on when not in use. Dried-out panel liners and knocked-over ink bottles are the two most common finishing-stage frustrations, both solved by a tray with low sides that keeps bottles upright and caps accessible.
Zone 3: Storage and Everything Else
Zone 3 is where organization tools earn their cost. The goal is to be able to find anything within 10 seconds without moving other things to reach it.
| Item Category | Storage Solution | Why It Works |
|---|---|---|
| Small tools (drills, grinding pen) | Modular divided box | Visible, no loose rattling, each tool in its place |
| Sandpaper sheets and sticks | Flat divided tray or labelled envelopes | Grits stay separated, easy to pull the right one |
| Paint bottles | Upright rack sorted by color family | Labels visible, no tipping, fast to find |
| Brushes | Upright cup, tip-up, never flat | Keeps bristles straight, prevents permanent bend |
| Spare consumables (blades, cotton swabs) | Small labelled containers | Refills don't require rummaging in drawers mid-session |
Tools That Change How You Use the Workbench
A few specific tools make the workbench meaningfully more functional beyond pure organization.
A hobby station or vise holds parts at the right angle while you sand, paint, or line them — freeing both hands and eliminating the "hold the part still with one hand while doing the thing with the other" problem. The Wooden Portable Hobby Station doubles as a raised platform that keeps the active build at a comfortable working height, reducing neck and shoulder strain over long sessions.
A paint shaker keeps paint ready without breaking the workflow. Walking to a shelf to manually shake a bottle, then returning to the bench, is a 60-second interruption that happens a dozen times per session. The Advanced Cordless Paint Shaker sits in Zone 2 and shakes while you do something else.
A brush cleaning station in Zone 3 means brushes get cleaned immediately after use rather than being left dirty until they're needed again. Clean brushes work better and last longer.
Small Desk, Small Space: Workbench Organization When Space Is Limited
Not every scale modeler has a dedicated room. Most work on a corner of a dining table or a small desk that doubles as something else. The zone system still applies — it just becomes vertical rather than horizontal.
Vertical storage (small shelves, pegboard strips, magnetic tool holders) puts tools at eye level and off the main work surface. A portable hobby station that folds or packs away means the Zone 2 tool setup can come and go without rebuilding the layout each session. The key in a small space is that setup and teardown take less than 3 minutes — if it takes longer, it stops happening consistently.
Modular Storage Box
Divided compartments for small tools — drill bits, tweezers, scribers. Everything visible without opening a drawer.
Hobby Station / Mini Vise
Holds parts at working height and angle. Frees both hands for sanding, painting and detailing.
Cordless Paint Shaker
Keeps paint mixed without interrupting the session. Set it running and continue building while it works.
Electric Brush Washer
Cleans brushes in seconds. Removes the main reason brushes get left dirty — it's faster than the alternative.
FAQ: Workbench Organization for Scale Modeling
What size cutting mat should I use on a modeling workbench?
A3 (45×30cm) is the most practical size for most hobby desks. It handles full runners and subassemblies without taking over the workspace. A4 works for compact desks or for travel builds. A2 is better if you regularly work on diorama bases or large scale models.
How do I organize painting tools on a small workbench?
Use a small tray with low sides to group active paints, liner, brushes and cotton swabs. This keeps the set movable as one unit between your Zone 2 and Zone 3 areas. Upright brush cups and capped liner bottles in a tray prevent the most common small-bench disasters.
How do I store sandpaper and sanding sticks so I can find the right grit quickly?
Label each grit clearly and keep them in order from low to high — either in labelled pockets or a flat divided tray. In active use, keep only the current grit range in Zone 2 and return them to storage when the sanding stage is done.
Workbench Essentials
Tools that improve every build session, not just individual builds.


