

Starting scale modeling is easier than the average hobby workbench makes it look. You do not need an airbrush, an electric sander, twenty paint colors or a drawer full of specialist tools. For your first build, the real job is simpler: choose a forgiving kit, learn to remove and clean parts without damaging them, dry-fit before you glue, and finish the model.
This guide is built around that goal. It tells you what to buy first, what to leave on the shelf, how to choose a first kit, and the exact workflow to follow from opening the box to the final details.
If you only remember 5 things
- Pick a subject you actually want to finish. Motivation matters more than choosing the theoretically perfect beginner kit.
- Buy only the core tools: nippers, a hobby knife, sanding materials, the right adhesive and good light.
- Cut away from the part, then clean the nub. Do not twist parts off the sprue.
- Dry-fit before glue. Most frustrating assembly mistakes are easier to solve before adhesive is involved.
- Your first model does not need to be perfect. A finished first kit is more useful than an ambitious one abandoned halfway through.
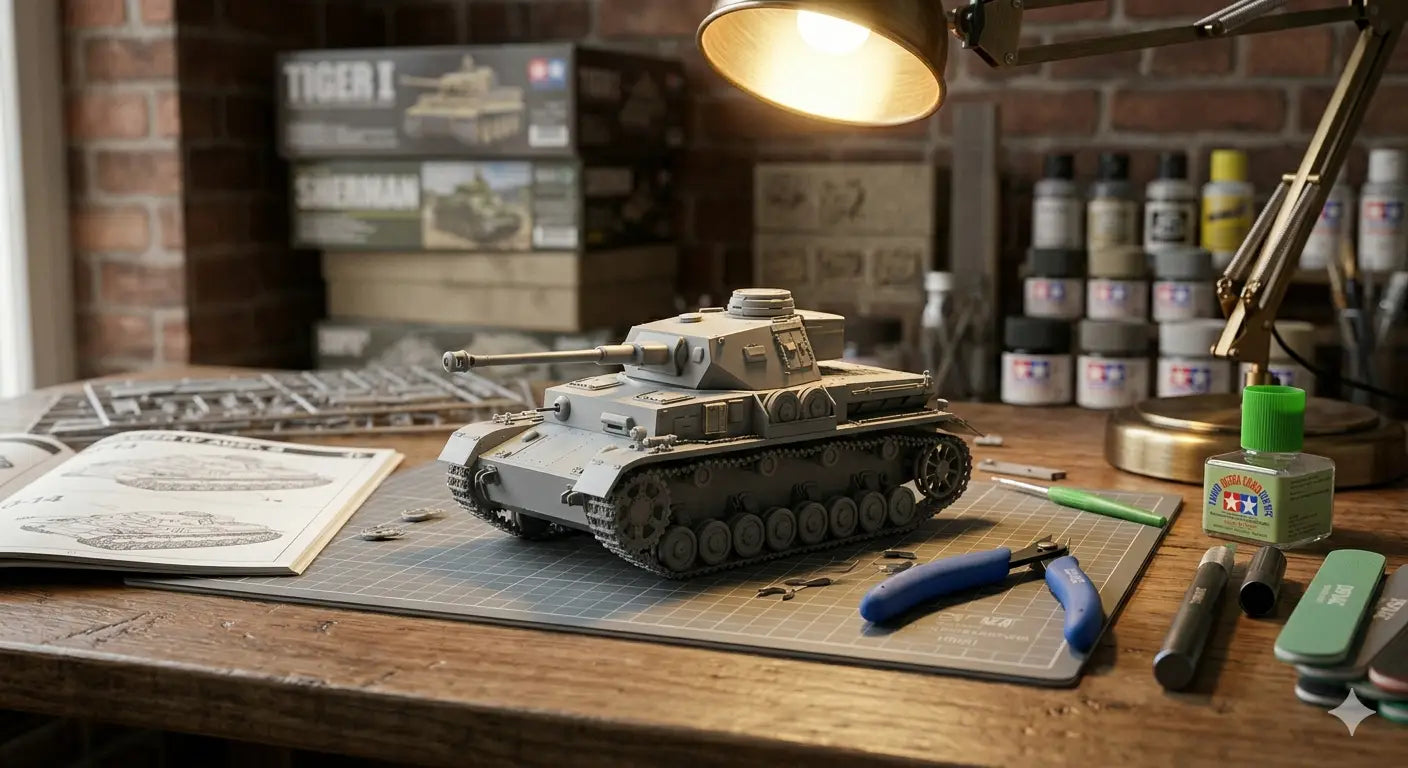
How to Choose Your First Scale Model Kit
The best first kit is not simply the smallest or cheapest one. Look for a kit that gives you enough room to learn without stacking several difficult techniques on top of each other.
| Check | Beginner-friendly choice | Be cautious with |
|---|---|---|
| Part count | Moderate, clearly organized build | Huge kits with hundreds of tiny parts |
| Materials | Mostly standard plastic | Mixed resin, metal and photo-etch on build one |
| Painting | Simple color scheme or a kit that still looks good with minimal paint | Complex camouflage as a requirement for success |
| Subject | Something you genuinely like | A “perfect beginner kit” you do not care about |
Which type of model is easiest to start with?
Often a friendly entry point because many kits are designed around straightforward assembly. Great for learning sprue cutting, nub cleanup and later panel lining. Browse Gunpla & Mecha.
A simple 1:48 aircraft gives you reasonably large parts while introducing seams, alignment and decals without becoming too tiny.
1:35 armor is a strong first choice if you like tanks and military subjects: parts are relatively easy to handle and small imperfections can be less visually punishing than on a glossy car or aircraft. Browse Military Modeling.
Start simple. Fine railings, rigging and very small fittings can make ship models more demanding than their box size suggests.
If you are shopping from scratch, start with the kits collection and judge the kit by complexity and subject—not by how impressive the finished box art looks.
The Beginner Toolkit: Must-Have, Useful, and Skip-for-Now
A beginner tool list is useful only if it distinguishes between what you actually need and what is merely nice to own.
| Priority | Tool | What it solves | Buying advice |
|---|---|---|---|
| Must-have | Nippers / sprue cutter | Gets parts off the sprue cleanly | A basic cutter works. If you prefer a precision single-edge option from the start, the Plamokojo Replaceable-Blade Single-Edge Nipper is a more specialized step up, not a requirement. |
| Must-have | Hobby knife | Trims the small gate left after cutting | Use a sharp blade and cut away from fingers and finished surfaces. |
| Must-have | Sanding sticks / sponges | Removes nub marks and refines seams | A useful starter progression is roughly 400–600 grit for cleanup, then 800–1000+ to refine the surface. Adjust to the plastic and finish you need. |
| Must-have | Correct adhesive | Joins parts securely | Match the glue to the material. Plastic cement is for compatible styrene parts; resin or metal may require a different adhesive. |
| Very useful | Tweezers | Small parts and decals | Not mandatory on day one, but useful quickly. One current option is our High-Precision Reinforced Tweezers. |
| Very useful | Cutting mat + good light | Safer cutting and easier inspection | Good visibility catches seam lines and alignment mistakes before paint does. |
A note about glue application
More adhesive is rarely better. Excess glue can squeeze onto visible surfaces, soften plastic or make cleanup harder. Apply only what the joint needs. If your chosen glue benefits from a small applicator, a tool such as the Precision Glue Dispensing Stick can improve control—but it is an optional convenience, not part of the minimum toolkit.
What Scale Is Best for a Beginner?
There is no universal beginner scale. The useful rule is that larger parts are generally easier to hold, clean and align, while smaller scales save space and usually reduce the physical size of the project.
| Scale / type | Beginner experience | Good when... |
|---|---|---|
| 1:72 | Compact, with smaller parts | Space matters and you are comfortable handling small pieces |
| 1:48 | Balanced size and detail | You want an approachable aircraft build |
| 1:35 | Larger, easier-to-handle components | Armor and military subjects interest you |
| HG Gunpla | Straightforward route into assembly and cleanup | You want to learn cutting, cleanup and optional panel detailing without starting with paint-heavy realism |
Step by Step: Your First Scale Model Build
Use this workflow for the first few kits. The sequence matters because it catches mistakes while they are still cheap and easy to fix.
1. Read the instructions before cutting anything
Look for assemblies that become difficult to paint once closed, parts that must move, and areas where several components meet. You do not need to memorize the manual; you need to understand the order of operations.
2. Inspect the parts
Check for obvious damage, flash or warped parts. Washing every modern plastic kit by default is not a useful ritual; clean parts if they are visibly dusty, greasy, contaminated or the manufacturer recommends it.
3. Cut the part away from the sprue
Make the first cut slightly away from the finished surface. This reduces the chance of stress marks or gouges. Then make a controlled second cleanup cut.
4. Trim and sand the nub
Use a knife only for controlled trimming, then sand the remaining mark. Start coarse enough to remove the defect and move finer to restore the surface. Do not keep grinding after the mark has disappeared.
5. Dry-fit the parts
Press the parts together without glue. Check alignment, gaps and whether nearby pieces interfere. This is one of the highest-value habits in model building.
6. Glue only after the fit makes sense
Use the correct adhesive for the material and apply it sparingly. Hold or clamp the joint only as much as needed to keep it aligned.
7. Deal with seams before paint
Once the joint is cured, inspect it under good light. Sand obvious seams and re-check the contour with a fingertip. Paint tends to exaggerate surface defects rather than hide them.
8. Decide what stays as a sub-assembly
Do not glue everything simply because the instructions show it in one diagram. If joining a part makes painting or access unnecessarily difficult, keep it separate until later.
9. Prime if you are painting
Primer gives you a consistent surface and makes scratches, seams and missed cleanup easier to see. If you discover a flaw, fix it now rather than burying it under color coats.
10. Paint in thin, controlled coats
Whether brushing or spraying, avoid trying to reach full opacity in one heavy pass. Let layers dry and keep handling to a minimum.
11. Add decals and optional panel detail
Decals and panel lines can add a lot without requiring advanced weathering. For Gunpla or models with suitable recessed lines, a pen such as the Fine Panel Liner Pen is one quick route—but panel lining is finishing, not a prerequisite for learning assembly.
12. Stop before you ruin a finished model
Weathering, chipping, pigments and extra effects are optional. On build one, knowing when the model is finished is a skill too.
Do You Need to Paint Your First Model?
No. If the kit is molded in useful colors—particularly many beginner-friendly mecha kits—you can focus on clean assembly first. For traditional aircraft, armor, cars and ships, painting often contributes much more to the final appearance, but you can still keep the first color scheme simple.
If you do paint, start with a small number of colors and practice control before chasing complicated effects. For curved stripes or shaped masking areas, flexible masking tape can be helpful; ordinary straight masking needs do not justify buying specialist tape just because it exists.
A Better Goal: Make Your First 3 Models a Progression
Trying to learn every technique on one kit is a reliable way to make the hobby feel harder than it is. A better progression is:
Learn cutting, nub cleanup, dry-fitting, glue control and basic decals. Finish it.
Add primer, a simple paint scheme and more deliberate surface preparation.
Try panel lining, basic weathering, masking or another technique that genuinely interests you—one major new skill, not six.
7 Beginner Mistakes That Cost More Time Than Tools Do
| Mistake | What happens | Better habit |
|---|---|---|
| Twisting parts off the sprue | Stress marks or torn plastic | Cut away first, then clean the gate |
| Using too much glue | Squeezed-out adhesive and damaged surfaces | Use the minimum needed for the joint |
| Skipping dry-fit | Alignment problems become permanent | Test every important joint first |
| Sanding only with one coarse grit | Visible scratches under paint | Refine the surface with progressively finer abrasives |
| Handling paint too early | Fingerprints and damaged finish | Treat drying time as part of the workflow |
| Buying advanced tools before a problem exists | Money spent without improving the first build | Upgrade when the same limitation annoys you repeatedly |
| Choosing an enormous first project | Fatigue before the useful learning loop is complete | Choose a kit you can realistically finish |
How Much Should a Beginner Spend?
A fixed dollar budget is misleading because kit prices and regional prices vary. The better rule is to spend in the order that improves every build:
- A kit you want to finish.
- Clean cutting and cleanup tools.
- The correct adhesive.
- Basic painting supplies if the kit needs paint.
- Only then: convenience and specialist tools.
If you prefer a pre-grouped starting point, compare the tool sets, but check what is actually included against the minimum list above. A bigger set is not automatically a better beginner purchase.
Your Workbench: The Cheap Upgrade That Helps Everything
You do not need a dedicated hobby room. You need a stable surface, safe cutting area, good light and enough organization that small parts do not disappear every ten minutes. A simple tray for current parts can be more useful on build one than a specialist power tool.
When your tools start multiplying, the workbench organization section becomes useful. Until then, keep the setup compact and visible.
When Should You Upgrade Your Tools?
Upgrade when you can name the recurring problem the new tool will solve. That one rule prevents a surprising amount of wasted hobby spending.
| Upgrade | Buy it when... | Not because... |
|---|---|---|
| Better nipper | Gate cleanup is a repeated frustration and you value cleaner cuts | It appears on an expert bench |
| Airbrush | You want repeated smooth coverage, priming or controlled spray effects | You think scale modeling requires one |
| Electric sander | You build often enough that repetitive sanding is genuinely slowing you down | Hand sanding is somehow “wrong” |
| Scribing tools | You want to restore lost panel lines or add deliberate surface detail | They look precise and professional |
Shop by the job you need to do
If a tool solves a real problem on your current build, these are the useful starting categories:
Scale Modeling for Beginners: FAQ
Keep learning without jumping five levels at once
Once the first kit is finished, move deeper into tools and technique with these guides: