
Mold lines on miniatures and parts
Fine raised lines where the two halves of the mold met. Easy to miss until primer or a wash catches them, easy to scrape off if you look early.
Quick answer
A mold line is a thin raised ridge left where the two halves of a mold met. Find it under a single low-angle light, scrape it off with the edge of a blade or a scraper held almost flat, smooth what is left with a fine file or sanding stick, then check again after priming and touch up any line that shows.
- Time2-10 minutes per figure
- DifficultyBeginner
Safety first
- Scrape away from your fingers and use a cut-resistant finger guard if you scrape a lot.
- Wear a dust mask when sanding resin or metal; wet-sand resin when possible.
- Wash hands after handling metal figures.
Is this your problem?
- The line is raised and runs round the partMold line: this page.
- It is a groove where two parts were gluedThat is an assembly seam: see Seams that keep coming back.
- There is a thin wafer of extra plastic along an edgeThat is flash: trim it with a blade, then treat the edge like a mold line.
- A resin print has ridges or bumps at support pointsThose are support marks, not mold lines; sand them in the same way, wearing a mask.
You'll see
A hair-thin raised line running along a figure, weapon or part, usually around the outside like the seam of a walnut. It becomes very obvious once a wash pools against it or a highlight catches it.
Likely causes
- Two-part moldsPlastic, resin and metal parts are cast in molds that split in two; a tiny amount of material escapes at the joint, leaving a line. It is part of manufacturing, not your fault.
- Worn molds (older or budget kits, metal figures)Mold halves wear and misalign over time, so the line gets bigger or slightly offset.
- Lines hidden until primingBare gray plastic hides fine ridges; a uniform primer coat and a wash show every edge.
What you need
- Hobby knife or dedicated mold-line scraper
- Fine files or sanding sticks/sponges
- Desk lamp for raking light
- Optional: magnifier, dust mask for resin and metal
How to fix it
- Use one lamp from the side (raking light) and turn the part slowly to find every line. Mark them with a pencil if needed.
- Scrape along the line with the back or edge of a blade, held at a low angle and pulled towards you, so you shave rather than cut.
- On rounded areas, follow the curve with light passes; on flat areas, a flat file or sanding stick gives a cleaner result.
- Smooth the scraped band with a fine file, sanding stick or sponge so no flat facet is left.
- Wash the part in warm soapy water to remove dust and mold release, rinse and let it dry.
- Prime, then check again under the same raking light. Scrape or sand any line that shows and spot-prime it.
What to avoid
- Cutting straight down into the line with the tip of a blade.
- Scraping across fine detail such as faces, hair and folds: use a small file there.
- Sanding so long on one spot that the surface goes flat.
Common wrong fixes
- Covering a line with thick paint: it shows more after a wash.
- Using coarse sandpaper on faces and detail: it removes detail along with the line.
Not worth fixing, or time to ask us
Lines on the back or underside of a part that will never be seen do not need work. Ask us if a mold line runs through very fine detail and you are unsure which tool to use.
By situation or hobby
Plastic miniatures (Warhammer-style and kit figures)
Scraping is the fastest method; plastic is soft, so light pressure is enough.
Metal (white metal/pewter) figures
Use fine files; metal is harder and blades blunt quickly. Do not eat, drink or smoke while filing and wash hands afterwards.
Resin figures and kits
Resin dust should not be breathed: wet-sand or file over a damp cloth and wear a dust mask. Resin also needs washing to remove mold release before priming.
Gunpla and kit parts
Mold lines on Gunpla are rare but appear on rounded parts like shields and barrels; the same scrape-and-sand method applies, finished with fine grits on unpainted plastic.
Already primed
Scrape gently through the primer, smooth, then spot-prime. No need to strip the whole figure.
Already ruined?
If a mold line shows after painting: scrape or sand that small area, spot-prime, and repaint the affected panel or fold. A wash will make any missed line obvious, so check before washing.
Next time
- Check every part under raking light before assembly.
- Clean mold lines before gluing, while you can still reach every side.
- Prime and inspect before color.
- Keep a sharp blade for scraping.
Frequently asked questions
Can you remove mold lines after priming?
Yes. Scrape or sand gently through the primer, smooth the spot and spot-prime it again.
What is the best tool for mold lines?
A blade or dedicated scraper for most lines, plus fine files or sanding sticks for flat areas and tight spots.
How do you remove mold lines from metal miniatures?
Fine metal or diamond files work best; blades blunt quickly on metal. Finish with a fine sanding stick.
Do I need to remove every mold line?
Only those that will be seen. Washes and highlights make visible lines stand out, so do the visible ones.
Why do mold lines only show after priming?
Bare plastic hides fine ridges; a uniform primer color reveals every edge in the light.
Jargon explained
- Mold line
- A raised line where two mold halves met.
- Flash
- A thin extra wafer of material at the mold joint.
- Raking light
- Light shining across a surface at a low angle, which makes ridges cast small shadows.
Tools that can help
-
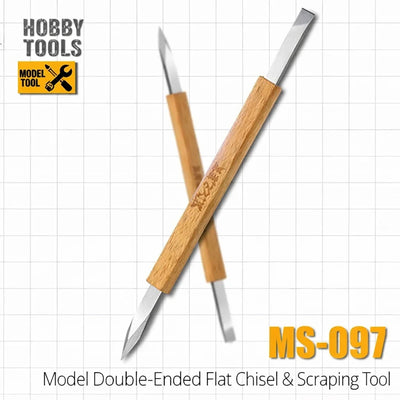
Mo Shi Tools Double-Head Scraper and Reamer $18.95
Why it helps: A shovel-shaped scraper blade at one end shaves mold lines and flash, with a tapered reamer at the other end for holes.
How to use it
Hold the scraper at a low angle and take light passes along the line.
-
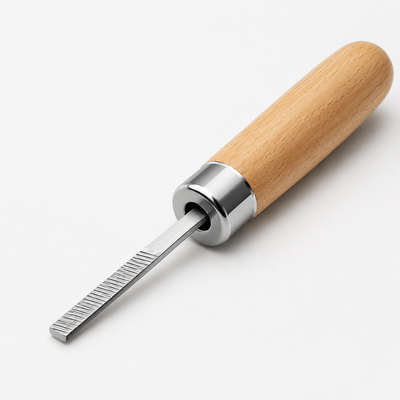
UStar Narrow Flat Polishing Files from $20.95
Why it helps: Slim files made to reach tight recesses and clean up seams that wider tools cannot reach.
How to use it
Use them in creases and between details after scraping.
-
10/20/100pcs Sanding Matchsticks from $7.95
Why it helps: Beveled abrasive sponge tips that fit hard-to-reach spots.
How to use it
Finish rounded or tight areas after scraping.
-
Semi/Full Face Dust Mask With Safety Glasses from $18.95
Why it helps: A full-face mask with safety glasses; check the product details for the protection it offers.
How to use it
Wear it whenever you sand or file resin or metal figures.


Reviewed November 3, 2026